Sunday, 24 March 2013

Crochet Tea Cosy

I finished something!!!

When I moved into my flat a bought a gorgeous dinner service by Denby, the White collection. It’s such a pleasure to use but the teapot isn’t the usual round shape so no tea cosies I could find would fit properly.
I decided to break into my Rico Creative Cotton Aran stash from The Wool Warehouse and have a go at making my own after being inspired by one a saw on Lululoves.

The Lululoves version was topped off with a pompom, I only had cotton yarn and I though the pompom might look abit droopy, so I had a little search on Ravelry and found this lovely tea cosy by Leah Maxwell. The Roses used in this design are a really simple pattern from the pom pom emporium.

With my two designs as inspiration, I set about making everything up as I went along, which is a definite first for me; I usually like a pattern to follow!

Here is my basic method:
  1. Chain enough stitches to reach from the base of the teapot to 1” above the lid, making sure to lay the stitches around the curves of the teapot to check the length is right.
  2. Row 1: Make a double crochet into the 3rd chain from the hook, and continue to double crochet into every chain along the row.
  3. Row 2 and every even row: Chain 3 and double crochet into the back loop only of every stitch along the row.
  4. Row 3 and every odd row: Change colours and crochet into the back loop only of every stitch along the row.
    1. I like to change colours on the last stitch of the row before, so when I have 2 stitches left on the hook rather than yarn over the old colour and pulling that through the 2 stitches on the hook, I yarn over in the new colour, leaving a 4” tail, and pull the new colour yarn through the 2 stitches on the hook in the old colour. Then I’m all set to start the next row by chaining 3 with the new colour. This makes sewing in the ends lovely with no lumps and bumps from the colour change.
Carry on double crocheting into the back loop only of every stitch, changing colours after 2 rows until your crochet will reach from the handle to the spout with the stripes running from the base to the lid of the tea pot.
Crocheting into the back loops makes the fabric more ribbed and stretchy so it will stretcher a little around the widest part of the teapot.


When you are happy with the width of your crochet, stop and repeat exactly what you have just done to create a separate piece with exactly the same amount of stitches and rows.

For my tea cosy I used 5 colours; dark pink, light pink, blue, green and orange. These colourful rows of stripes were repeated in the same order 4 times for each piece.

Now you have two separate pieces that are as tall and as wide as your teapot, you just need to stitch up so there is a hole for the spout and the handle. I sat with my teapot infront of me and slipstitched the pieces together with my hook, trying on as I went to get the best fit.
When it came to the side with the handle, I sewn from the lid down to the top of the handle. Then left a space for the handle. I then worked out where would be best so sew a button underneather the handle, so I could open the button to get the cover off and on. When I worked out the position I slip stitched along the edge of the cosy, from the bottom edge up to my button location, chained 5 stitches once I reached he button location and slip stitched back into the stitch I started my first chain, to create a little loop to sit over the button. On the opposite edge I sewn the button into position.


You need to sew in all the ends! If your very organised you could have done this as you went along... However I like to leave it until the very end and moan about doing it for days, until I actually get around to sewing them in, which takes less than 1hr in front of the TV one evening.

Now gather your top edge together so less heat can escape from the cosy. I decided to use the same edge which all my woven ends were, so the visible edge around the base of the teapot was a neater finish. I simply inserted my needle through the middle V of the last stitch on every other row, basically grabbing one stitch of every colour all around the top edge. I then pulled the thread tight to gather it all up and anchored the thread by weaving it into the top edge of the cosy.


After crocheting the beautiful roses your ready to stitch them to the top of the cosy, wherever you think looks lovely.


I’m really pleased with this cosy, quite surprised I actually finished anything so quickly and didn’t follow a pattern to complete it.


Have you made a cosy before? What is your favourite quick to crochet project?

Thursday, 21 March 2013

I won something!

I am on the train to London for a lovely day out, after winning a competition I entered for tickets to The Country Living Spring Fair!

This is what the website has to say about the fair:
The Country Living Magazine Spring Fair is the perfect place to stock up on new and inspiring ideas for your home and garden. Once again, The Business Design Centre in London’s Islington, will be host to independent designers, small producers and craftspeople from across the British Isles, many of them exhibiting for the first time. Treat yourself to a whole new look from the unique jewellery and fashion collections, sample delicious regional fare in the Food Hall and discover furniture, fabrics and accessories to add country style to your home.

Can't wait to get there and start exploring. Homes, gardens and crafts all under one roof sounds like the perfect way to spend a well deserved day off work. Hopefully I can find a cup of tea soon!

Thank you xx

Friday, 15 March 2013

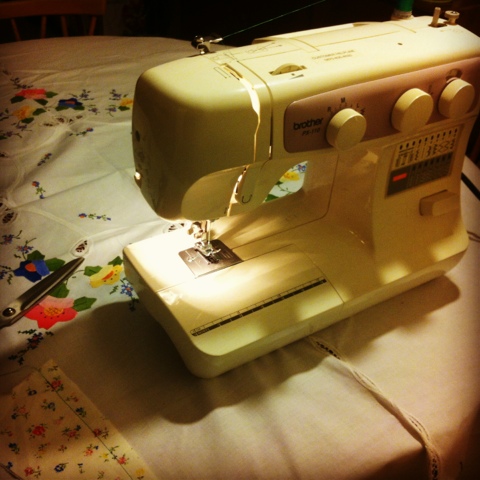
Rediscovering my Brother PX110 sewing machine

For the past 2 years I haven't sewn a single thing on my Brother PX110 sewing machine since getting very irritated with the tension settings.

My mum purchased a Janome SL30X machine, so I was able to jump on and finish a few projects without getting too annoyed with the machine settings. The more I used the Janome the more I loved sewing with its computerised features; the tension auto adjusts to any material you pop under the presser foot, the speed is controlled by a slider on the machine rather than your foot on the foot pedal. These little features help to make each stitch feel easier and projects to feel very manageable.

Since moving out of my parents and getting my own flat I lost access to the beloved Janome. I started searching high an low for the same model to buy, but it was a special edition and the nearest model was £300, over my budget!

On Saturday I grudgingly travelled back to my flat with my old sewing machine, Brother PX110, in the boot of my car. After realising how much I wanted to start sewing my own clothes again and not being able to afford the machine I wanted I decided to give my old machine one last whirl before listing it on eBay, so I could afford a fancy new machine.

Armed with some thread and a fabric scrap, I went back to sewing basics and relied upon my instruction manual to give the machine a service so it would be okay for the new owner.

I cleaned out the bobbin shuttle and feed dogs, removed the covers and oiled the machine and gave it a good high speed run without any thread. When I threaded up the machine, snapped a new needle into position and set the tension and stitch settings as instructed in the manual I finally began to sew...

I couldn't stop.....

I dug out a summer dress I started 2 years ago and set about finishing it off, on my lovely Brother PX110 machine.

Okay it isn't computerised like the fancy Janome, but knowing exactly what effect each dial has on the stitches made is very liberating. Rediscovering what my machine can actually do, through the simple act of reading the manual, has got me quite excited for future projects.

Watch this space for the beginnings of a handmade wardrobe.

What machine do you use? What features do you find the most useful on your machine?

Thank you xx


Monday, 11 March 2013

Toft Alpaca - Bulb Bag Workshop

On 26th January I skipped off to The Toft Alpaca Shop in Dunchurch for the Bulb Bag workshop with two lovely friends.
To start the day we had a lovely walk around the farm to see all of the alpacas, there are over 250! They were all a little more interested in the grass as it was the first day of the snow thawing.
Returning back to the shop we made the tough yarn decisions and began knitting the bag.
I wanted to knit up a cream bag, after seeing a lovely completed one on display. The only cream yarn was a 50/50 wool alpaca blend, which was a good choice as it made the upgrade from a mini to a big bulb bag a little less.
I really enjoyed having a few hours dedicated to knitting, I wouldn't usually sit for such a long period of time and knit row after row. The benefit of the workshop was getting help from someone experienced for the tricky parts you think you know, but want some confirmation your doing the right thing.
By the end of the workshop i had completed the base of the bag, pick up all the stitches around the edges and knitted all the increase rows. So I was left to decrease and make the handles at home before felting.

I completed the knitting in just over a week. However the finishing took my a few more weeks. Its always the part of a project I put off for as long as possible as I'm never certain how to do it right.
When knitted up the bulb bag is quite loose, so I found sewing in the ends was a challenge as it was adjusting the tension and looked quite scruffy, however my friend who also attended the workshop convinced me the felting process would work its magic.

I added my saggy bulb bag to the washer with an old rough cream towel and washed on a 40deg cyclce and waited for the magic to happen. After 2 washes I lost my bottle and took the bag out to dry...

The stitches were still quite visible and the bag was still quite saggy, so it went back into the washing machine for another tumble with the towel.
After leaving the bag to dry for a couple of days I pressed the front flap as it had become a little wonky during the felting process.
I still think it needs another felt so I haven’t sewn the button on yet, this weeks project…

I cannot believe how quick this bag knitted up, I'm still a little uncertain on the chunky tail like bag handle, however I love the shape of the bag body. I already have my eyes on a humbug version....
Having such a lovely shop near by could be very dangerous, there are workshops planned for nearly every weekend. On April 1st there is a family open day where there will be tours of the farm to see the lovely alpacas.

Thank you xx