Showing posts with label Crochet. Show all posts

Sunday, 24 March 2013

Crochet Tea Cosy

I finished something!!!

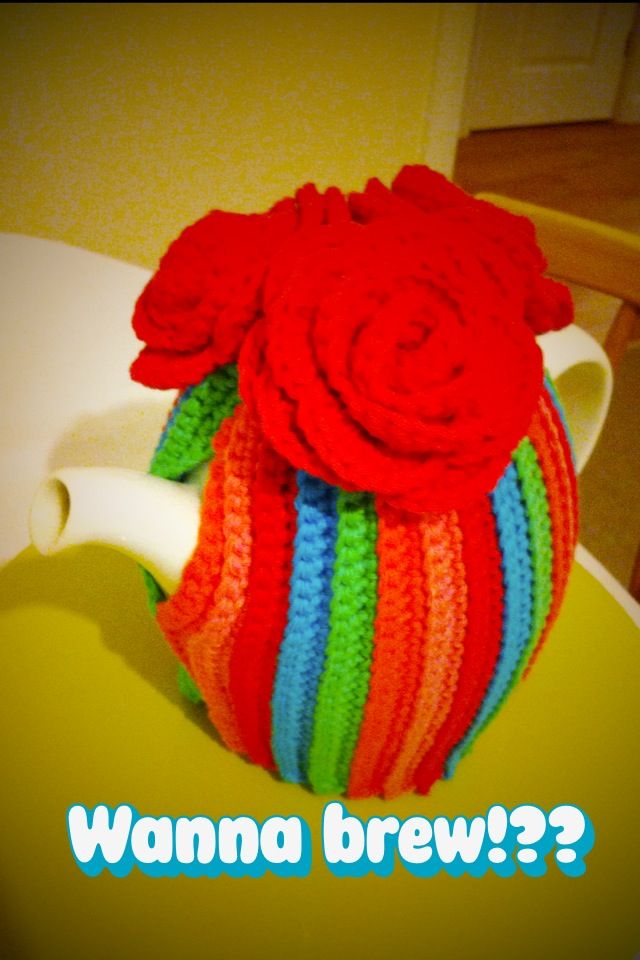
When I moved into my flat a bought a gorgeous dinner service by Denby, the White collection. It’s such a pleasure to use but the teapot isn’t the usual round shape so no tea cosies I could find would fit properly.
I decided to break into my Rico Creative Cotton Aran stash from The Wool Warehouse and have a go at making my own after being inspired by one a saw on Lululoves.

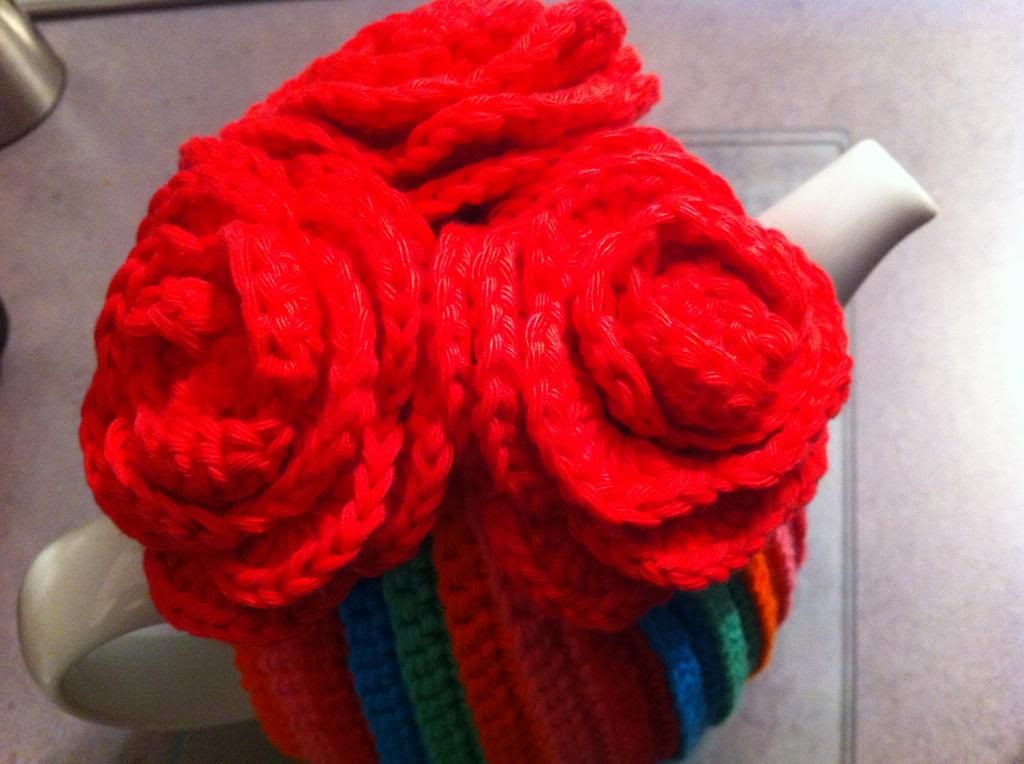
The Lululoves version was topped off with a pompom, I only had cotton yarn and I though the pompom might look abit droopy, so I had a little search on Ravelry and found this lovely tea cosy by Leah Maxwell. The Roses used in this design are a really simple pattern from the pom pom emporium.

With my two designs as inspiration, I set about making everything up as I went along, which is a definite first for me; I usually like a pattern to follow!

Here is my basic method:
  1. Chain enough stitches to reach from the base of the teapot to 1” above the lid, making sure to lay the stitches around the curves of the teapot to check the length is right.
  2. Row 1: Make a double crochet into the 3rd chain from the hook, and continue to double crochet into every chain along the row.
  3. Row 2 and every even row: Chain 3 and double crochet into the back loop only of every stitch along the row.
  4. Row 3 and every odd row: Change colours and crochet into the back loop only of every stitch along the row.
    1. I like to change colours on the last stitch of the row before, so when I have 2 stitches left on the hook rather than yarn over the old colour and pulling that through the 2 stitches on the hook, I yarn over in the new colour, leaving a 4” tail, and pull the new colour yarn through the 2 stitches on the hook in the old colour. Then I’m all set to start the next row by chaining 3 with the new colour. This makes sewing in the ends lovely with no lumps and bumps from the colour change.
Carry on double crocheting into the back loop only of every stitch, changing colours after 2 rows until your crochet will reach from the handle to the spout with the stripes running from the base to the lid of the tea pot.
Crocheting into the back loops makes the fabric more ribbed and stretchy so it will stretcher a little around the widest part of the teapot.


When you are happy with the width of your crochet, stop and repeat exactly what you have just done to create a separate piece with exactly the same amount of stitches and rows.

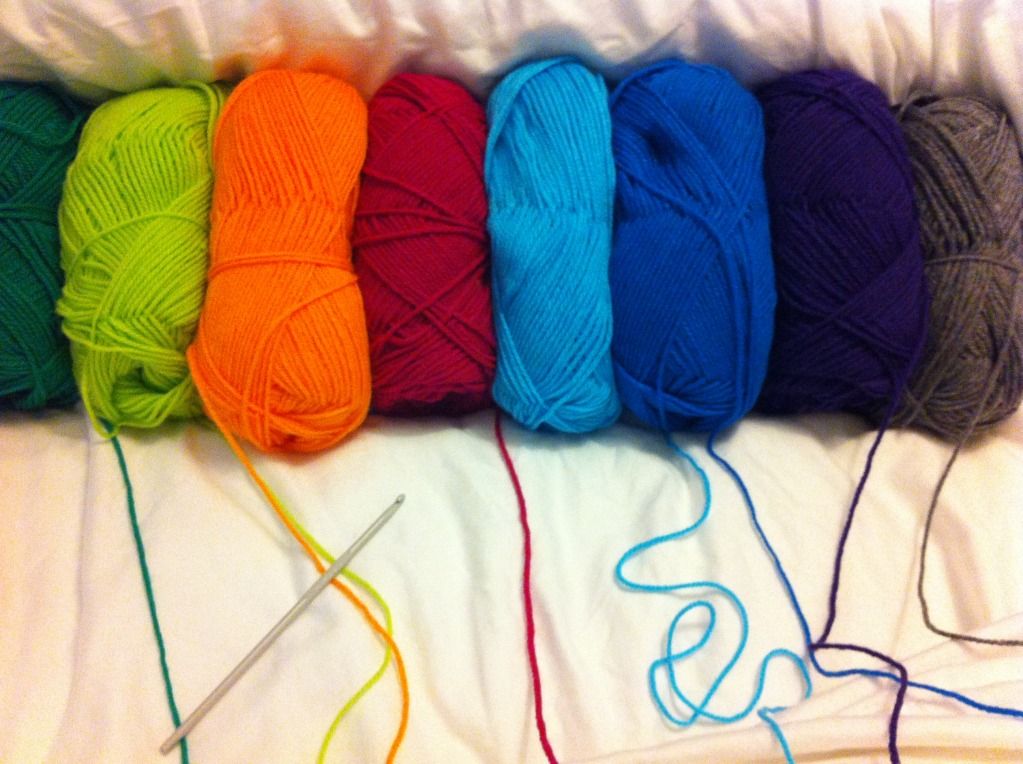
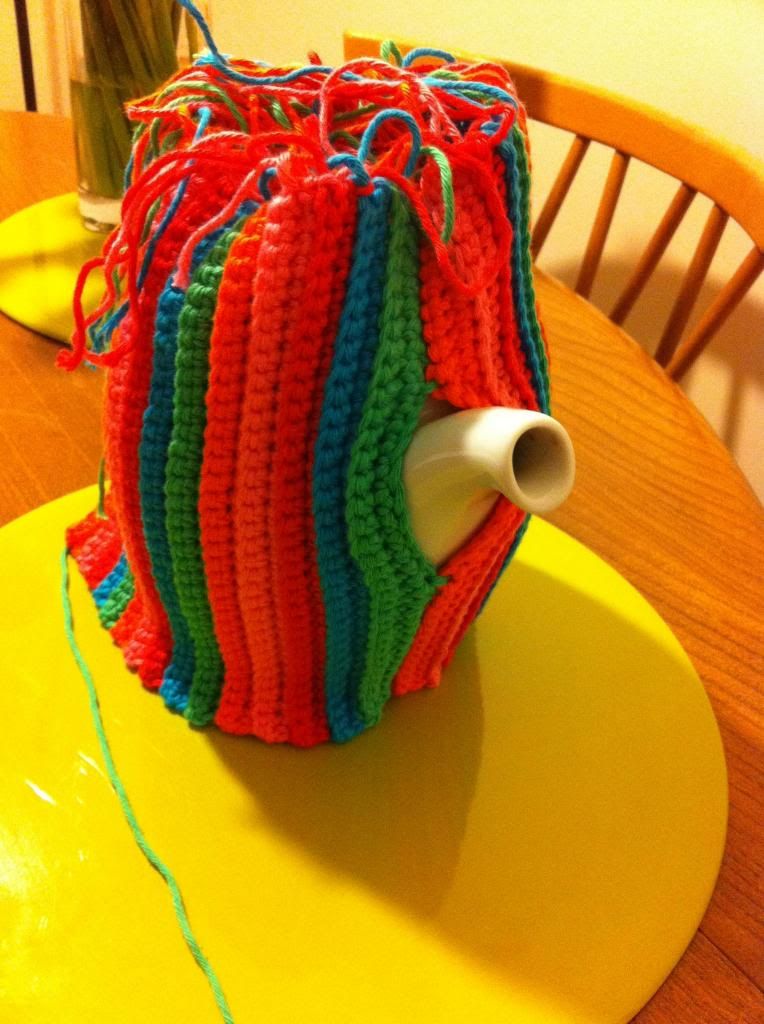
For my tea cosy I used 5 colours; dark pink, light pink, blue, green and orange. These colourful rows of stripes were repeated in the same order 4 times for each piece.

Now you have two separate pieces that are as tall and as wide as your teapot, you just need to stitch up so there is a hole for the spout and the handle. I sat with my teapot infront of me and slipstitched the pieces together with my hook, trying on as I went to get the best fit.
When it came to the side with the handle, I sewn from the lid down to the top of the handle. Then left a space for the handle. I then worked out where would be best so sew a button underneather the handle, so I could open the button to get the cover off and on. When I worked out the position I slip stitched along the edge of the cosy, from the bottom edge up to my button location, chained 5 stitches once I reached he button location and slip stitched back into the stitch I started my first chain, to create a little loop to sit over the button. On the opposite edge I sewn the button into position.


You need to sew in all the ends! If your very organised you could have done this as you went along... However I like to leave it until the very end and moan about doing it for days, until I actually get around to sewing them in, which takes less than 1hr in front of the TV one evening.

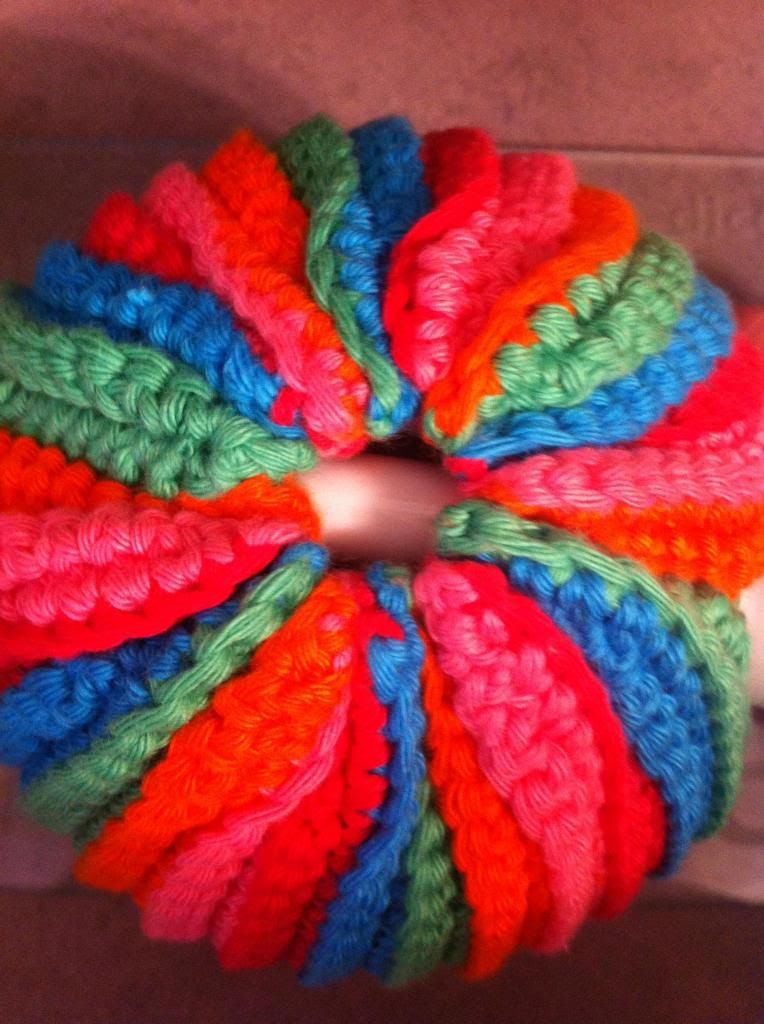
Now gather your top edge together so less heat can escape from the cosy. I decided to use the same edge which all my woven ends were, so the visible edge around the base of the teapot was a neater finish. I simply inserted my needle through the middle V of the last stitch on every other row, basically grabbing one stitch of every colour all around the top edge. I then pulled the thread tight to gather it all up and anchored the thread by weaving it into the top edge of the cosy.


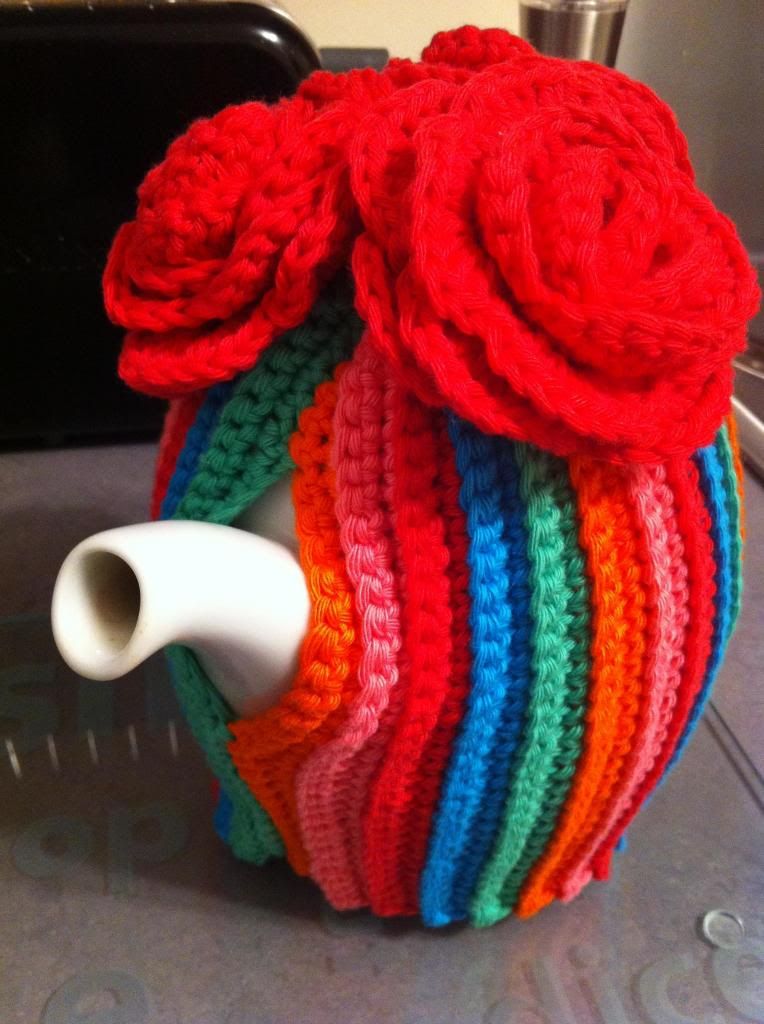
After crocheting the beautiful roses your ready to stitch them to the top of the cosy, wherever you think looks lovely.


I’m really pleased with this cosy, quite surprised I actually finished anything so quickly and didn’t follow a pattern to complete it.


Have you made a cosy before? What is your favourite quick to crochet project?

Wednesday, 7 November 2012

Project Progress: Granny Square Blanket

Wow crocheting a blanket is hard work!
When I started way back in March 2012 I knew it would be a challenge to create a blanket. Usually when knitting or crocheting I have tended to stick to small items, a hat, a headband, gloves… so the size of a blanket is huge in comparison!

However crocheting the granny squares has not been a problem for me. I have my woven basket carrying all my yarns, I select two colour combinations and in 40/50mins I have hooked up five, 3 round squares: 2 rounds of contrasting colours with 1 round of white.

I decided to aim for a 14 row x 14 rows blanket, this meant I would need 196 granny squares.
On Sunday the day came where I counted out my squares and was very proud to realise I had 200!

So.then.the.long.long.long.task.off.laying.out.all.the.squares.began…
I stacked up all the same colours into piles, then lined them up into rows so i could see all the coulours avaiable to me when laying out the 14 x 14 row blanket. I then set about creating a 'random' blanket layout.

Turns out I am not a random kind of person, my idea of random has quite a few rules and limitations:
  • Same 1st round colours cannot go next to each other
  • Same 2nd round colours cannot go next to each other
    Opposit colour combinations, like orange 1st round and blue 2nd round, and blue 1st round and orange 2nd round cannot go next to each other.
So after 3 hours of laying out my squares in multiple combinations I just was not happy with the random look, I didnt have enough squares that were different enough for my liking to be combined in a suitable random fashion - that I found acceptable. There was always a square sticking out at me like a sore thumb!
Months of crochetting and I couldn't find a design I was happy with - however i thought struck me... I love rainbow colour combinations and I used rainbow colours to make my squares with, so why not go for a more organised layout...

I started laying out the squares in rows: Pink, orange, lime green, dark green, light blue, dark blue and purple. I started to really love how it was turning out, but i didnt have enough granny sqauares to complete this layout, so I spent 6 hours watching twilight films hooking away to fill my quota. It was like being on a production line, plaining the right colour, hooking up 5 squares, laying out and rearranging the combinations, seldcting another colour.
This is where I finished on Sunday night:

I found the process of planning the layout really difficult, it all seems so final and permanent deciding on the right layout for the blanket. But i did manage to sort it after a whole days graft!

Next i realised my biggest error, not sewing in any of the ends as I went along, so aswell as having to sew every square together I have to sew in 6 threads on every square,
20 rows x 13 rows = 260 squares x 6 threads = 1560 threads to sew in and snip, oh no!!!!!

Thank you xx

Wednesday, 17 October 2012

Review: Geek Chic Crochet

After seeing this book mentioned in Mollie Makes, I pre-ordered straight away on Amazon, so I was lucky enough for Geek Chic Crochet to be posted through my door as soon as it was released!
Nicki Trench has filled this book with 35 really inspiring patterns. Many of the garments would not look out of place in a boutique store; desirable vintage style gaments and accesories.

I'm new to crochet so appreciated the 'Crochet Know How' section at the back of the book to refresh my memory of stitches and techniques.
Each pattern has a skill level: Beginner, Improver or Experianced, so I can gradually work my way towards some of the more challenging patterns.

The first project - which is my first ever crochet garment/accesory - I decided to attempt from the book was the 'Turban Headband'. I had some DK yarn and the right size hook next to me, so it seemed a shame not to give the pattern a try...
The pattern states "A really quick and easy project" im always very sceptical of these statements, as generally im not quick at finishing anything! I'm not sure if thats my slow hook skills, short attention span, or ability to start multiple projects in the space of one hour. However...This really was quick!!
I crocheted and finished (the part I hate with knitting, but found finishing crochet very intuative and neat) this headband in less than 2 hours whilst watching the X-Factor an a Saturday night.

I excitiedly tried on my first crochet accessory as soon as it was finished, at around 10pm at night!
I am very pleased with the outcome, im looking forward to sporting this on a cold day to keep my ears toasty.
The yarn isnt anything fancy, it is a ball of Top Value acrylic from my local market for £1.15 a ball. Using this pattern though it crochets up to something which looks alot more expensive.
Im already planning to use the remaining yarn with the same stitch to crochet 2 matching rectangles, so I can sew them up to be quick matching fingerless gloves.

I found this book easy to follow and full of patterns that were cleary explained. Best part is I liked all 35 patterns in the book!
My next project...
'Chunky Patchwork Scarf' to brighten up my dull black winter coat and keep my stylishly toasty.

Thank you xx

Geek Chic Crocket - Nicki Trench
Details:
  • Paperback: 128 pages
  • Publisher: CICO Books (1 Oct 2012)
  • ISBN-13: 978-1908170873
  • Monday, 3 September 2012

    Project Progress: Granny square decisions

    Blogging gives a completly new perspective to my crafting!

    The process of creating my granny square blanket post made me consider what I was creating. Seeing all the colourful squares laid out, I started to really love how it looked. After photographing the progress of my blanket and decisions I was taking, I started to question how it was going to look.
    So I have scraped the decision to add more white to the borders and have been busy crochetting more granny squares!

    I have over 160 squares completed now... sewing these together is going to be a challenge!!!

    Thank you xxx

    Saturday, 25 August 2012

    Project: Granny Square Blanket


    My very first crochet project is a Granny Square Blanket.

    The inspiration came from Mollie Makes Issue 13; a pattern by IlariaChiaratti for a basic granny square. I really loved the use of white with all the colourful centres of each square.

    On a trip to my local market I stocked up on some Top Value DK, an acrylic yarn I had never used before. However at £1.15 a ball I thought it was a colourful easy care yarn, which seems good value, for my first project.

    So far I have found the squares very satisfying and quick to crochet.
    I have tried to be logical with the colour sequences, making 5 of each combination, so I do not have 20+ squares my favourite colour combination ruining the random colour sequence I would like to achieve.
    All was going well until I decided to empty my carrier bag of completed squares onto the dining table so I could work out how many squares I needed to finish the project.
    Laying them out randomly, so no to colours were next to each other, my 135 completed squares started to look like a blanket rather than a pile of yarn...success!

    However I found the dark purple, dark green and grey colour combinations too dark. I was imagining a bright playful blanket and looking at what was in front of me I was slightly disappointed.
    After taking a step back and thinking clearly about what my expectations were I realised I needed a slight re-jigg. My plan of attack:
    ·         Remove the dark-dark colour combinations
    ·         Add more white

    I ended up removing 20 completed squares from my project bag and have started adding an extra round of white to every completed square, so now each square is 4 rounds.

    This blanket has been work in progress since around March. I started to crochet it after I reserved my flat!! I currently live with my parents, but after saving I finally put a deposit down on my first home, alone! So since March I have been slowly working away on this blanket, so it will be ready for my new flat.
    I have lots of works in progress for my new home. Hopefully I will be able to post about them over the next few months, so I can share some of my first home preparation.